
AfterPay Payment Integration
Once installed and setup, the AfterPay Payment Integration app will allow users of your site to select and use AfterPay as a payment option in your site checkout. When a user chooses to use AfterPay as their payment for an order, upon completion of checkout, they'll be forwarded (through the app) to AfterPay's payment interface. Following successful payment with AfterPay, the user is sent back to your website for their order receipt and eCom is notified that the order has been paid for.
Follow instructions in Lightspeed eCom to purchase the AfterPay app from the App Marketplace. During install, you'll be forwarded to our app management site to either login to an existing account (if you've purchased a Lightspeed eCom app from us before) OR create a new account with us to install and manage this and any future apps you may purchase from us for Lightspeed eCom.

Once you've created an account or logged into your existing account, the app installs automatically, after which you'll be forwarded to the shops list, which displays a list of Lightspeed eCom shops registered with your account and any apps installed with those shops. To manage this app, click on it's name "AfterPay Payment Gateway" under the appropriate shop. This will take you to the settings form.

Under settings, you can control the following:
- Display - this is the label that will show for this app in the list of payment options in your eCom checkout.
- Active - determines if AfterPay should show in your checkout as a payment option. Check box and save changes to show, uncheck box and save changes to hide.
- Endpoint - set which endpoint (marketplace) to use for this integration
- Mode - if you want to perform test transactions with AfterPay, set mode to Test. If you want to take real payments, set mode to Live.
- Merchant ID - your account ID from AfterPay.
- Secret Key - your secret key from AfterPay.
- Currency Code - the 3 character ISO 4217 currency code for the base currency being used in your eCom webstore.
- Auto Generate Order - Don't show instructions with 'Create AfterPay Order' button page, just attempt to generate order automatically. Do not use this if also using our Gift Card payment app.
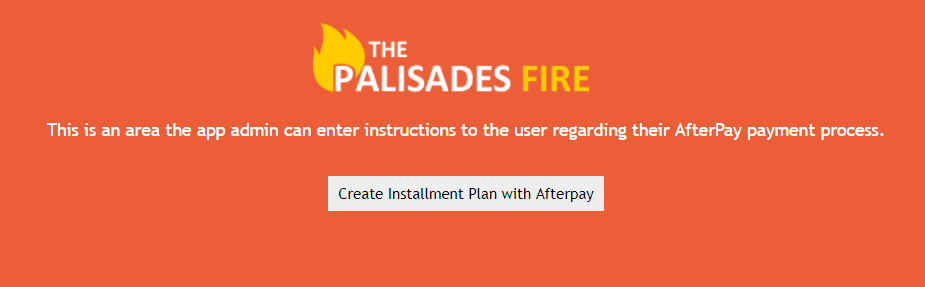
Example "AfterPay Instructions" page, optionally shown to customer before they start generating an order with AfterPay. Uncheck "Auto Generate Order" to display a page like this to your customers.
- Show Instructions to Customer - if you want to display some custom instructions to your customer, uncheck "Auto Generate Order" setting and check this setting. After saving changes, go to the Translations tab and update the text for the "AfterPay Customer Instructions" message.
- Button Text Color - Set the color for text within any buttons that show on app's payment pages.
- Button Background Color - Set the color for the background of any buttons that show on the app's payments pages.
- AfterPay Min (per your contract) - Set the minimum order total needed to make payment via AfterPay. If a customer's order total is less than this minimum, AfterPay will not be shown as a payment option in your store's checkout. On a product's page, if the price doesn't meet the minimum, the AfterPay pricing breakdown widget will not display.
- AfterPay Max (per your contract) - Set the maximum order total needed to make payment via AfterPay. If a customer's order total is greater than this maximum, AfterPay will not be shown as a payment option in your store's checkout. On a product's page, if the price is not less than the maximum, the AfterPay pricing breakdown widget will not display.
- Widget Logo Color - Indicates which AfterPay logo should be shown with the AfterPay "Call to Action" text on a product's details page.
- Widget Background Color - set the background color for the widget display.
- Widget Text Color - set the color of text within the widget display.
- Widget Position - determine where the AfterPay Price Breakdown widget should display on the product details page. You can either have it:
1. Overlay at the Top of the Window
2. Overlay at the Bottom of the Window
3. or Target an Existing Element in the page to insert the widget next to - Widget Target Element - Only required if Widget Position is set to 'Target an Existing Element'. Set where on your product page you want the AfterPay "Call to Action" to display. This is determined by targeting an existing element, usually the product's existing price display block, in your product page. The value expected here is either a class, ID or another valid jQuery selector.
NOTE: If you're unfamiliar with CSS, Javascript, or jQuery, we recommend you contract someone familiar with web development. What is needed is a way to tell this app which element you want target, in the product page, so the app will show the AfterPay "Call to Action" text next to that element. - Widget Target Action - Only required if Widget Position is set to 'Target an Existing Element'. This tells the app where, in relation to the target element you've specified in the previous field, the Call to Action should be inserted.
- Icon - Select the icon you'd like to see next to the payment option in your checkout. The available icons are limited to these options offered by Lightspeed.
- Logo URL - Provide full (absolute) URL (web address) to the logo you'd like to display on any of this app's payment pages.
- Background Color - Select the background color you'd like for any of this app's payment pages.
- Text Color - Select the text color you'd like to use for any text displayed on this app's payment pages.
- Custom CSS - Only for users with advanced experience working in CSS code. Any CSS provided here will load on any of the app's payment pages. Warning: improper use of this field may cause the app to not function correctly.
- Custom Javascript - Only for users with advanced experience working in Javascript. Any Javascript provided here will load on any of the app's payment pages. Warning: improper use of this field may cause the app to not function correctly.

If you make any changes to any of these fields, be sure to click "Save Settings" button to save those changes. After you have saved your changes, be sure to scroll to the bottom of the page and click "Check Install (Publish Changes)" to ensure any changes you've made are published to the eCom website. It can take several minutes for Lightspeed to publish changes.
If you'd like to change the text that displays on any of the app's pages, click on the "Translations" tab. This will take you to a list of text that you can enter translations for in any of the supported languages. Each piece of text has a default value, but you can override that value by entering your own into the message's translation field. Be sure to click the "Save Changes" button after you enter/change any translations. After you update translations, come back to the settings tab and click "Check Install (Publish Changes") to ensure your translation changes are published to the eCom website.
